22/05/2024- 30/06/2024 (Week 10-Week 15)
Lizzie Tanaka (0362065)
Video and Sound Production | BDCM | Taylor's University
Final Project: Stop Motion
LECTURES
To prepare us for the stop motion, Mr Martin had us conduct trial shoots in groups. He gave us a reference to copy. We had to shoot using a DSLR camera and from our phone. There was two reference video: clay and papercut.
Fig 0.1 Clay character
Fig 0.2 Paper character
INSTRUCTIONS
For our final project, our task is to create a stop motion for a PSA video. We can choose to do it individually (30 seconds) or in pairs (1 minute).
Mr. Martin asked us to share our three favorite stop-motions. I have picked three that I liked from Youtube:
Western Spaghetti by PES (2008)I decided to do it in pairs with Aisya. Our idea was to create a PSA video for ocean pollution due to people throwing their trash into the ocean. We first thought of our storyboard, our main character, how the set will look like and how we're going to make it. We decided that our set will be made using paper, cardboard, and used plastic bag in blue as the main backdrop. Our main character will be made using clay.
Here's our proposal:
Our stop motion started with a hand throwing a handful of trash to the sea and the camera goes down into the sea. Then the main character is shown and it is hungry, so it starts to eat the trash, mistaking it as food. However, soon after it realized that it's not food, and it dies.
In week thirteen, we asked Mr. Martin for feedback and he told us that the creature isn't relevant to the ocean lives and it would diminish the relevance of our message to the audience. After the feedback, we decided it would be better to have a fish as our main character.
Making the set and main character
Aisya did most of the set and the main character. For her blog, click here. Here is the moodboard that she compiled:

We started by making the set and the character. For the set, we used a used cardboard and covered it with blue plastic bag which we taped on the outer side so it wouldn't move a lot (Picture 1 of fig. 0.0). In our first meeting, we managed to only finish the main backdrop and the shape of the fish. To make the features of the sea, Aisya started by drawing the shape and placing it inside the set, making sure that it fits well before coloring it with markers. The main 'waves' is painted using gouache that I lent her.


Shooting for the first draft
Shooting is done at Aisya's place since we live closeby and is less complicated than bringing our properties to campus. Because Aisya has done a lot in the set and the character, I contributed in the shooting and editing part.
We didn't follow the storyboard as accurately because we realized it would look messy and weird. In the storyboard, it starts with a hand throwing the trash. However, we started by filming the fish being hungry and then trying to find food. Coincidentally, it found a trash bin. The trash bin here symbolizes that the trash came from humans, also because we thought that there are a lot of these kind of trash that goes underwater, not only small trash like plastics, but also larger sized trash. The fish pushes the can into the frame and it pushed the can down to open the inside. Once the trash inside goes out, the fish eats it but then realized it isn't food and it dies. For the death scene of the fish, we flipped it upside down, since in real life, when a fish dies, it usually flips on the side. We disassembled the fish as well to dramatize the impact of eating the trash.
We shot using the stop motion app on three frames per second.

The shooting took around 3 hours and we proceeded to edit our video.
Editing the first draft
For the editing, we started by adding sound effects:
- Underwater ambience
- Sand slides
- Stomach rumbling to represent hunger
- Cartoon mumbling to represent the fish complaining about being hungry
- Food crunching when the fish eats the trash
I also color graded the clips. When the ocean is still clean without trash, the tone is warmer, showing that the ocean life is good before human's trash polluted. Once the scene changes to the fish pushing the trash can, the tone becomes colder, showing that the ocean life is not as good with humans' trash polluting the habitat. We also added the motto/title: "Bin It, Don't Drown It" and our names to the end of the video.

Our issue here was the grainy quality that was very visible during the
zoom-ins. We zoomed it because we wanted to show the fish expression. I
tried using the 'de-noise' effect on Premiere Pro but it lowered the
quality too much. The dark lighting also added to the bad quality of this
video.


We asked Mr. Martin for feedback and he told us don't zoom from the wide shot to the close up scene. After this feedback, we decided we'd just re-shoot the whole thing from the beginning. We also noticed that the dark lighting might be why the video is grainy.
At first, we thought of re-shooting from the zoom-in scene but truthfully, we weren't satisfied with our result yet. We decided to re-shoot the whole thing.
Shooting for the second draft
We spent a few hours just reassembling the fish because some parts was broken and we couldn't get the mouth to look good and neat.

After we're done getting the props ready, we shot again but this time with a brighter lighting. Maybe it's because we learned from our mistakes, so we had a more solid process and did it much quicker than the first process. We were also on a time limit because we shot it under sunlight and the sun was about to set.

This time, we shot it on 5 frames per second. We both thought that with three fps, the result was too rushed and wasn't as smooth. With 5 fps, we had more time to show our story.
Because we had more time, we decided to add a few scenes such as:
- The fish circling around the can, showing that it's curious
- The trash falling out had more screen time, we showed the fish looking at it and feeling confused.
- Made the fish eat more than one trash
- Made the fish attempt to clean the trash to the side after realizing it didn't taste good/it wasn't food.
Editing the second draft
This time, the quality was sharper and way better. For the editing, we started again by adding sound effects:
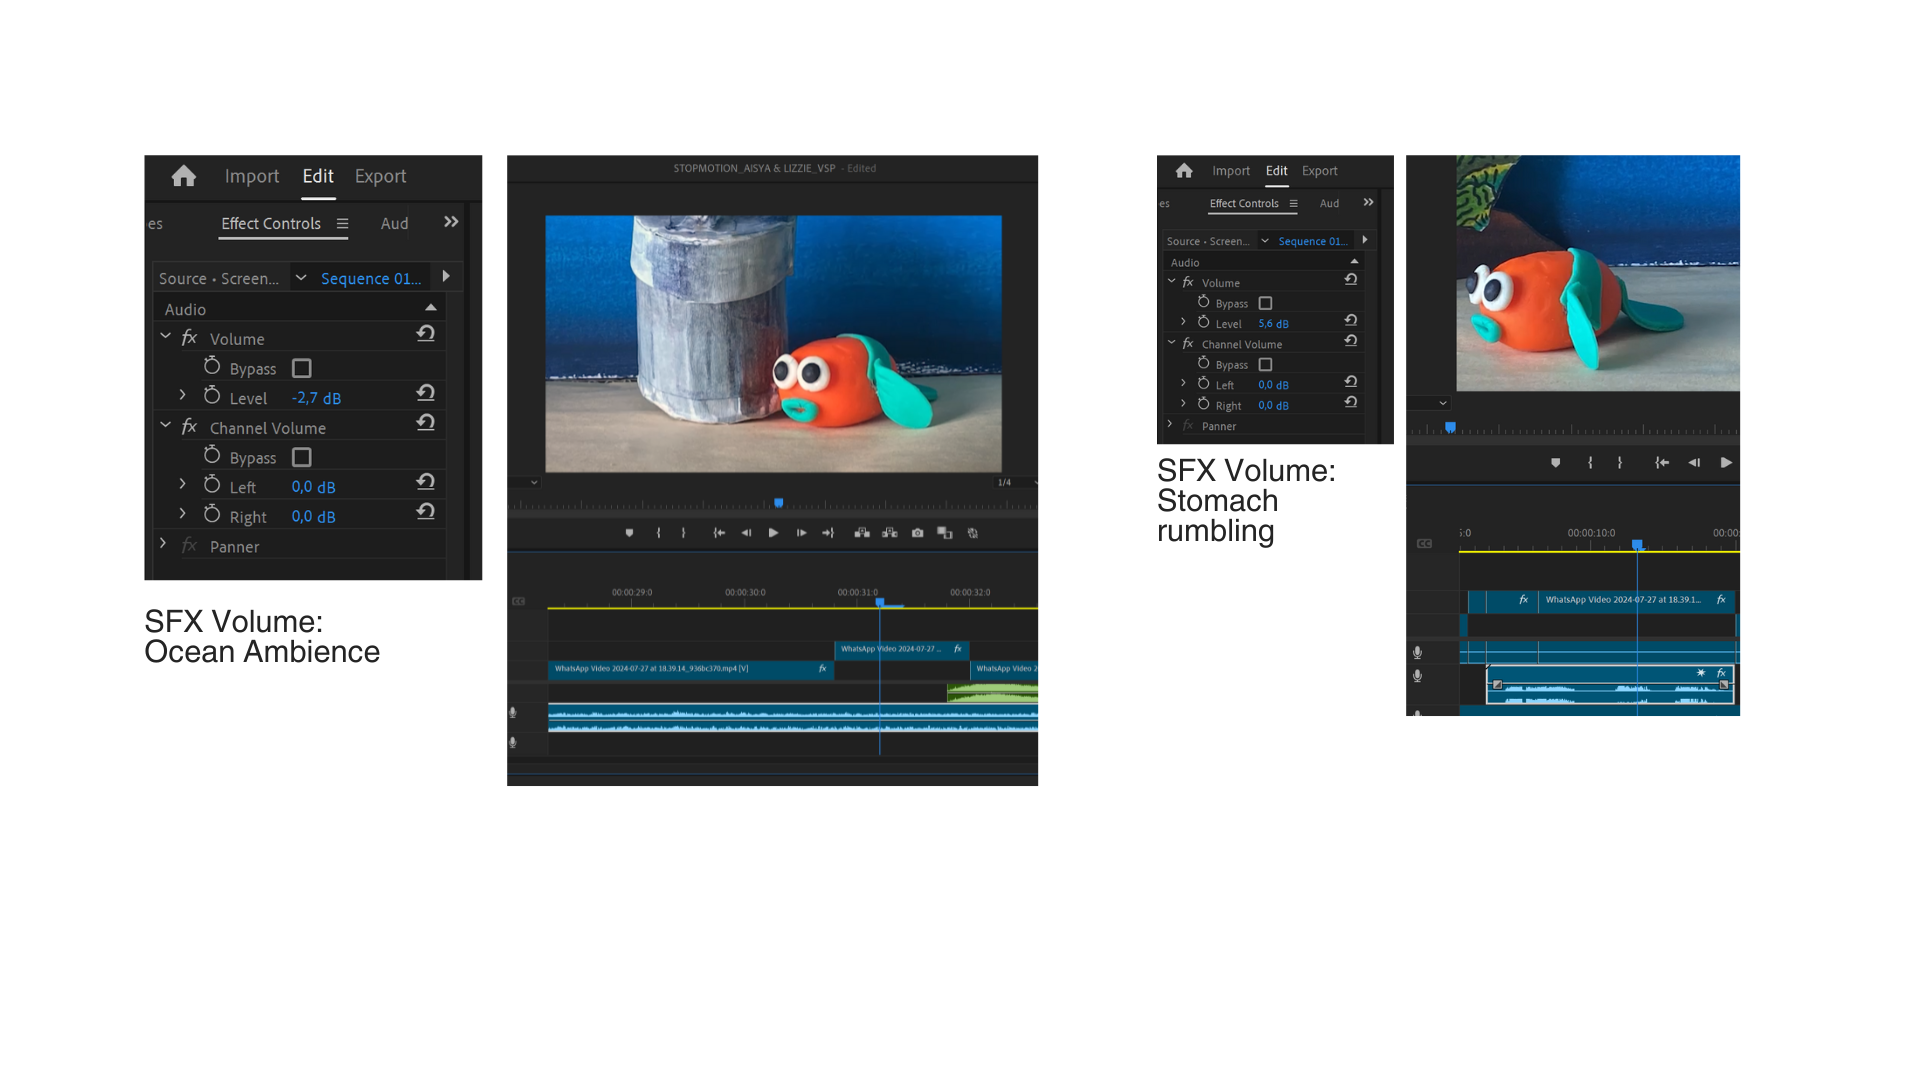
- Underwater ambience: Since this is a continuous sound throughout the video, I lowered the dB amount so it wouldn't be too loud. I wanted the sound to feel like it's far away.
- Stomach rumbling to represent hunger: the dB amount is also lowered so that it wouldn't stand out too much after the softer sand slides.
- Sand slides: Unlike the first draft, where the sand slide is a continuous sound throughout the video, I decided to add the sand SFX only when the trash can is being pushed by the fish as well as a little impact sound when the trash bin falls.

- Food crunching when the fish eats the trash: For this specific SFX, I didn't play with it's dB amount since it was quite low from the original creator. I just cut the audio to fit with the scene where the fish was eating.

We both decided not to add the 'cartoon mumbling' sound effect since we thought it doesn't fit the video well.
I also did the same color grading effect as the first draft. The scene before the trash falls around is color graded with a yellow tint to make the tone warmer. The warmer tone is to symbolize the ocean being clean and a safe place to live for the creatures. I also added a vignette to dim the video by a little bit. We felt like because the bottom of the ocean is probably a bit dark, I could edit the brightness to make it feel dimmer.


For the zoomed in part, I zoomed it in during editing, instead of during the shooting, which was also our mistake. The trash can falling down is also zoomed in to avoid the stick pushing the trash showing on the frame.


I asked for Mr. Martin's feedback again for our second progress. He said that this was much better and can be submitted. I did a few re-checks on the editing part to ensure everything was consistent and well.
FINAL SUBMISSIONS:
FEEDBACKS
Comments
Post a Comment